

Recycled Bottle Top Bug Fridge Magnets
Step by step showing how to make your own upcycled fridge magnet bugs by recycling bottletops, presented by Crafty Corner
For any questions contact us via emailWhat a creative way to reuse and recycle old bottletops, create cute, handmade upcycled fridge magnets for your home!
Although small, every bit of recycling we do does make a difference, and these bottle tops are no exception. This is a great way to teach your kids about recycling and have fun at the same time. follow our easy step by step instructions to learn how to make your own!

What you need to make upcycled bottletop fridge magnets:
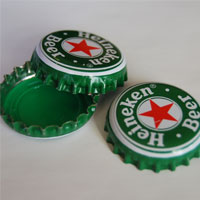
- Rinsed bottle tops from soft drink or beer bottles
- Small magnets, to fit in the back of the bottletop
- Black acrylic paint & red spray paint
- Small paintbrush
- Wire & wire cutters
- Pencil
- Permanent marker
- Glue gun
Step 1
Make sure all your bottle tops are rinsed and dry, and ready to be upcycled.
Step 2
Once dry, you can paint the bottle top. We started with black acrylic paint and a paint brush, and when this was dry, we went over it with red spray paint and then left the paint to dry. Our black base coat isn't really necessary, but it might help give your recycled ladybug a more uniform colour.
When working with paint, and particularly with spraypaint, it is always a good idea to cover your work surface with old newspaper.
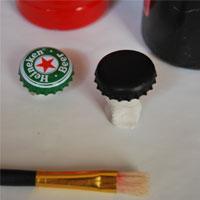
Another great idea is to use a stick of prestik. Simply press the one end on the bottom of the bottle top and stick the other end onto your work surface. This makes it easier to paint, and easy to remove when dry.
Step 3
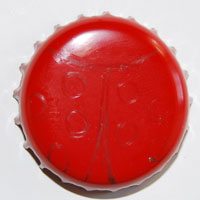
Right, with your recycled bottle top painted red, use your pencil to lightly outline the wings for the ladybird design. Once you are happy, paint in the black head and wing detail with your acrylic paint and brush. Carefully use your small brush to paint these on and then leave the paint to dry.
If you are not too confident with the brush, a great way to cheat this is by simply using a black permanent marker to fill in the detail.
Step 4
How exciting! We are nearly there... What we need now are legs for the ladybird.
Using your wire cutters, cut 6 lengths of wire about 10cm long.

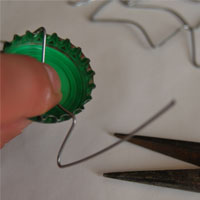
Step 5
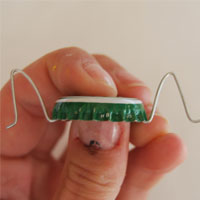
Take a single length and place it over the back of the bottle cap, with the centre roughly in the centre of the cap. Using your thumb, push the wire down. Using your other hand, push the wire back out over the cap to the top, while still holding the centre with your thumb. If looking at the cap from the side, you should have bent the wire (coming from underneath) to a 2 o' clock position. Use your needle nose pliers to bend the wire again about 1m from the first bend, to bring it back down, to the 5 o' clock position. Now use the pliers to bend the end out to a 3 o' clock position, about 1cm from the second bend.
Step 6
After creating six sets of legs as above, for the ladybird, you are ready to secure them in place. Switch on the glue gun and allow to heat. Place your bottle top upside down on your working surface.
Step 7
Once the glue gun is hot, place a dollop of glue to the centre of the inside of the cap. Now, carefully and quickly position each leg. First the centre leg which will lay on the centre line (9 o'clock to 3 o'clock) of the cap. The next leg will diagonallylay over the first, from 8 o'clock to 2 o'clock. The next and final leg will lay over both one and two, on the line from 10 o'clock to 4 o'clock. Once all the legs are in place, place another dollop of glue on top and place the magnet on top to secure in place. Allow to dry.

Step 8
Turn your bottle cap over and Voila! Well done, you have very easily and very simply, created something fun for your fridge and you have taken a small step towards recycling something that could have ended up in the trash.
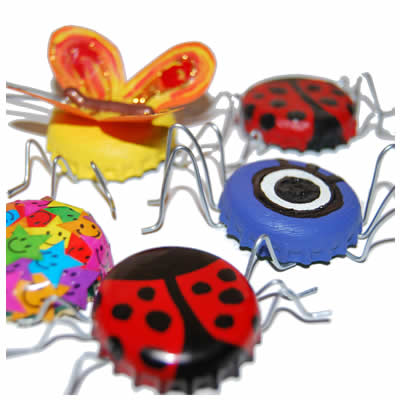
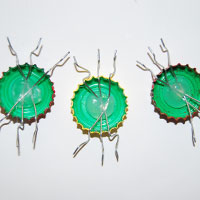
Step 9
With your upcycled ladybug complete, it is time to make a whole family of bugs. Here are some ideas to get you started.