Repairing Grouting
Easy step by step instructions showing how to repair your own tile grouting, presented by Crafty Corner
For any questions contact us via emailYou look at your tiled floors and see that in some places the grouting is coming out between the tiles or the grouting was not done properly. On older houses, sometimes the grouting just starts cracking because it is old and in order to preserve the tiles, you need to put in new grouting. How do you repair it without taking out the whole tile?

What you need:
- Grout saw
- Grout
- Colorant, if needed
- Grout float, sponge, or both
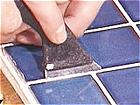
Step 1
Use a grout saw to remove the cracked or damaged grouting and clean it well with water. If there is no grout in that particular area, then just clean it with water.
Step 2
You can mix the grout if necessary or you can use a pre-mixed grout. If the current tile grout on the tiles is a different color, then mix in the correct grout colorant that you need.
Be sure to check the label when you buy grout, you need to have the correct grout for the type of tiles you will be using it for. Do not use sanded grout if you have marble or shiny tiles as the grout can scratch and damage the tiles.

Step 3
Using the grout float or sponge, apply the new grout in between the tiles. Don’t worry about getting the grout onto the tiles, you can clean it off later with a sponge and water.

Step 4
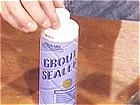
Once you have grouted in between the tiles, you can now leave it to cure. Read the label on the packaging to see for how long the grouting must cure. Once it is dry, clean off the excess grout that messed onto the tiles using warm water and a sponge. Once you have cleaned the excess grout off the tiles, you can now add on a grout sealant which will protect the grouting for a long time.