Silicone Rubber Split Candle Mould
Step-by-step on how to make a silicone rubber split candle mould, presented by Crafty Corner
For any questions contact us via email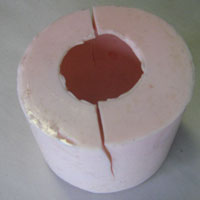
What you will need:
- 250g RTV555 silicone rubber
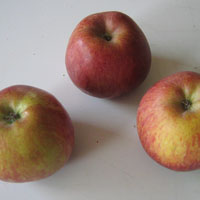
- Apple, or another object you would like to mould
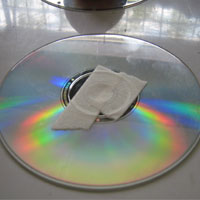
- Stage/working surface (CD)
- Hot glue gun
- Strip of acetate
- Dala construction glue
- Scissors
- Scale
Step 1
Take the apple you are going to make a mould of and clean the surface thoroughly to ensure there are no fingerprints or unwanted marks on the surface. RTV555 silicone rubber is sensitive enough to pick up silk screened paint markings on the surface of the original object. The best thing to use is a corner of a soft, lint free cloth soaked in acetone to remove any unwanted prints and even paint. You can purchase acetone and silicone rubber from Crafty Corner, click for pricing.
Note: If your chosen object is pourus, the silicone rubber will seep into the original and possibly get stuck or give your moulded object a rough finish, as well as damage your original. Seal the surface with a varnish, or gel coat first. The silicone rubber itself will not damage the object to be moulded but if you have to seal the surface this process may damage the object.
Step 2
Select a smooth, impervious flat surface on which you can glue or fix the apple to while you are making the mould. This could be a piece of melamine, glass, mirror, or even an old CD. Clean the surface thoroughly with acetone, and if using a CD, remember to seal off the centre hole.
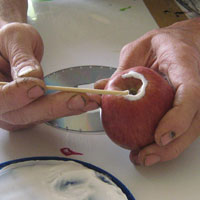
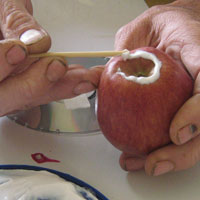
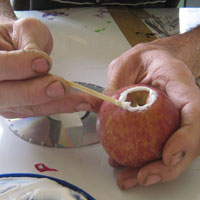
Step 3
Using Dala construction glue, sculptors putty, hot glue or any glue that you can use to build up a ridge around the top" of the apple, form a ring of glue so that you can stick the apple to your working surface; this is to ensure that the apple or any object that you are using cannot float to the surface of the rubber while setting, or allow the rubber to seep under the apple while it sets. Set the stage aside to dry before you continue.
Note: This is not a high speed project, the slower and more accurate you work the better the final results of your project will be.
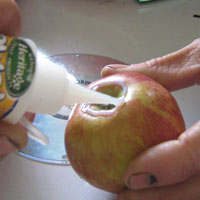
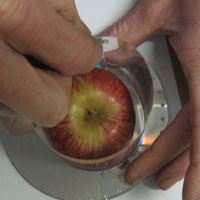
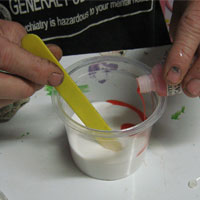
Step 4
To give yourself the highest chance of a bubble free surface when your object is removed from the mould, take a small amount of rubber and add 2% catalyst. Then paint your apple or selected object with a thin layer of catalysed rubber. This is especially important if you do not have a vacuum chamber in which to place your mould after the catalysed silicon rubber is poured.
Note: If your scale is not accurate enough to measure the weight of a small amount of rubber and catalyst, mix enough catalyst to make the silicone rubber a light pink; about the same colour pink as your nail.
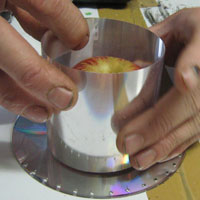
Step 5
Form a dam wall around the object you are moulding - the best thing to use is a piece of discarded acetate. The acetate needs to be high enough to ensure that the apple will be covered by about 4 5 mm of rubber, and long enough to go around the circumference of the apple, ensuring that you have a rubber wall of about 4 5 mm. Once you have your piece of acetate ready, turn it into a ring with a bit of masking tape. Ensure that the inner end and outer ends are sealed to make it leak proof.
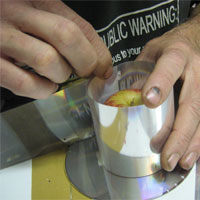
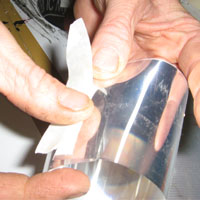
Step 6
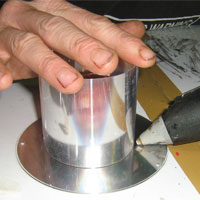
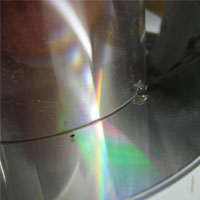
Hold the acetate ring gently in place, making sure the bottom is flush against your stage. With the apple in the centre of the ring on the stage, use a hot glue gun (available from Crafty Corner on request) and gently place a spot of glue every 2 -3 cm around the base of the wall of acetate.
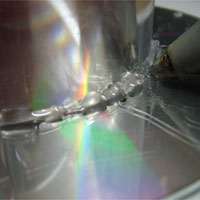
This will hold it in place so that you can then, when the glue is cold, completely seal the bottom of the acetate to your stage working surface. Work slowly and carefully all around the base of the wall to ensure a complete leak proof seal. The rubber will take 4 -5 hours to set and during the first 45 min can leak enough silicone rubber from the mould to leave the apple exposed.
It is easier not to have a leak than to try plug a leak!
Step 7
You now need to work out how much silicone rubber and catalyst to use for your silicone rubber mould. To do this, work out the approximate volume of your apple and the approximate volume of your mould. Follow this link to a volume calculator, or you can measure (width x height x length) x specific gravity =
.g for a square object, or (pie r2 x height) x specific gravity =
..g. Once you have the volume / weight of each part you then subtract the object from the mould to get the required amount of rubber.
Note: For a safety margin, we recommended that you add at least 10% extra rubber to compensate for what is left in the mixing cup and for uneven surfaces.
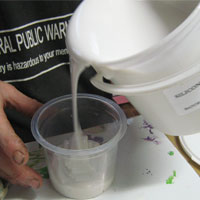
Step 8
Measure the required amount of rubber; it is recommended that you use a good quality electronic scale. Kitchen scales will work for larger amounts, but you will have to do a little guess work for very small amounts. If you have vacuum chamber, place the un-catalysed silicone rubber in your chamber for 10 min to remove any air trapped in the silicone rubber.
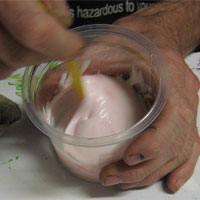
Then add 2% pink catalyst (supplied with the rubber) to the portion of rubber you have measured out. Mix the catalyst into the rubber slowly to reduce the amount of bubbles you create in the rubber. Continue mixing until your silicone rubber is an even colour.
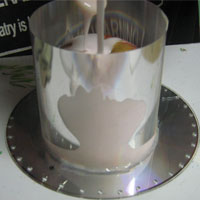
Step 9
Pour your catalysed silicone rubber slowly into the mould. Do not pour the rubber directly onto the object if possible, rather fill it slowly from the base upwards. This will minimise the risk of air pockets in your mould. If you have space, you can pour the rubber down a metal or glass rod to minimise the creation of bubbles.
Do not rush this step, rather work slowly and carfully and let the rubber settle at its own pace, you have about 30 min to work with the rubber on a cool day before it starts to congeal. Continue pouring until the apple is completely submersed in silicone rubber.

Step 10
If you have a vacuum chamber, place the mould into the chamber and vacuum for 10 min. The less air / bubbles you have in your mould the more durable and better quality your mould will be. If you do not own a vacuum chamber, gently knock or vibrate the mould for about 10 min. This helps to agitate any large air bubbles to the surface of your mould.
Set the silicone rubber mould aside and allow to cure in a warm, dust free place. In optimum conditions the silicone rubber should cure within 4 5 hours, but I recommend leaving it overnight.
Step 11
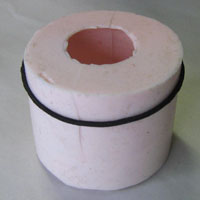
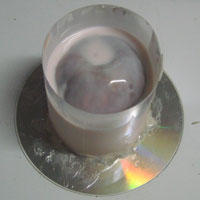
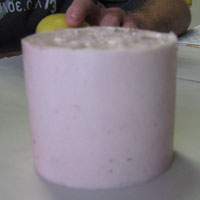
Once the silicone rubber has completely cured, remove the acetate wall, then peel the cured silicone rubber mould from the CD. You should be able to see the apple that you have moulded from the top of the filling end of the mould.
Step 12
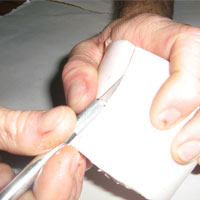
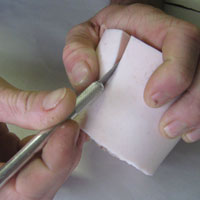
Take a scalpel or razor blade, the thinner and sharper the knife the better, and cut down one side of the mould until about 1cm from the base. This will create the split in the silicone rubber mould and allow you to remove the apple original from the mould.
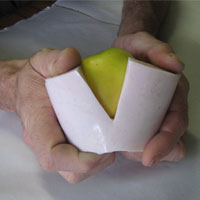
Step 13
Using a sharp pair of scissors, clean off any excess silicone rubber around the mould, and also and rubber that may have seeped in on the filling edge of the mould, so that you now have a clean finish.
Step 14
Time permitting, soak the mould in water for 48 hours and then leave to dry in a cool, dry place for 7 days. This completely cures the silicone rubber, ensuring maximum strength of the mould.