

Fiberglass Pot Repair
Easy step by step instructions showing how to repair a fiberglass pot plant, presented by Crafty Corner
For any questions contact us via email
Lees in Afrikaans
What you need to Repair a Fiberglass Pot Plant:
- 1 x Ratchet tie down flat rope
- 1 x Piece of scrap cloth about 10 x 10cm
- 1 x Tube of Pattex No More Nails glue
- 1 x Caulking Gun
- Some old newsaper
- 1 x Large piece of scrap cloth
Notes:
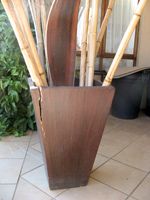
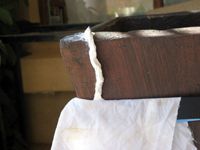
I have this long square fibre glass flower pot outside on my porch which fell over during a strong windstorm and got quite a large crack from the top down. Hmmm... now I had a choice, either throw it away, which cost quite a bit of money, or I could try to repair it so that I will still be able to use it for which I was using it for to hold Bamboo stems for decoration. I chose to repair it. Now, sometimes things do tend to not always go the way you plan when repairing something and, this is just what happened to me in this little project.
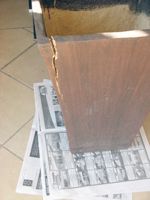
Step 1
Firstly, place the plant holder onto the newspaper to catch any glue that you may mess. Make sure that the inside of the crack is clean from any visible dirt or debris. If there is then just blow it out or use a brush to clean it out.
Step 2
After doing this, you can now take the Caulking gun and put the tube of No More Nails into it.

Step 3
Now this is where things went wrong.
Ive had the No More Nails for a while so I had forgotten that inside the nozzle, the glue had already dried so there I went and started to squeeze the trigger of the Caulking Gun. All of a sudden everything happened at once. Firstly, the handle of the Caulking Gun broke and the whole nozzle of the glue tube also broke. Now how was I going to proceed, without a nozzle I could still make a plan but a broken Caulking Gun, thats a problem, how do you now squeeze the glue out of the tube?

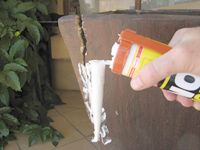
Step 4
Easy, use the bar at the back of the Caulking Gun and with a bit of strength, just push the bar into against the back end of the tube, and the glue will now come out where the nozzle has broken off.

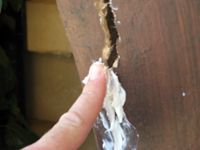
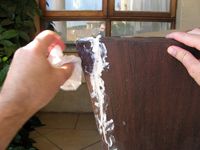
Step 5
Just use your finger and scoop some of the glue onto it and rub the glue in between the crack from bottom to top
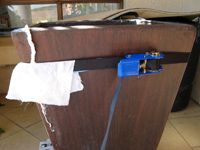
Step 6
Then you take the ratchet tie down rope and wrap it around the top of the plant holder at about the top of the crack. Make sure that the rope goes over the wet cloth and does not touch the glue else you will be ruining the rope. Tighten the ratchet rope till it is nice and tight around the plant holder.
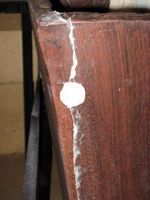
Step 7
With the tightening of the ratchet rope, you will now see that you have pulled the crack closed and some of the glue has been squeezed out. Just use your finger to remove the excess glue.
Step 8
After removing the excess glue with your finger, take the big piece of cloth, wet it and squeeze out the excess water and now clean of the glue that got spread around the crack so that it looks neat.
Step 9
Just leave the plant holder in this position of with the ratchet rope tightened around it for 24 hours. After the 24 hours, you can now remove the ratchet rope, put the pot back into its normal place and return to it whatever you want in it, in my case, the bamboos.
Fiber Glass Repair kit
We sell kits for quick repairs. All you need to patch and fix that crack or hole.
Contact Mark
082 855 2236
Fiber glass moulds
Crafty Corner have specialized in creating custom moulds for all occasions and customer requirements. Fibre glass moulds for pots, sculptures and any other requierments. Send Mark and email with your specs, requirments and some pics of what you trying to achieve and he will be able to assist you.
Contact us, Crafty Corner