

Mosaic Cross
Easy step by step instructions on how to make a mosaic cross, presented by Crafty Corner
For any questions contact us via email
This is a great, step by step to create a mosaic cross for a special occasion, such as a beautiful mosaic cross to celebrate Christmas or Easter, or simply make it to hang in your home. There are many mosaic designs you could follow, or simply free-flow and come up with your own mosaic designs.
This project requires some basic mosaic knowledge and provides more of a suggestion or idea for a project than full step by step instructions.
Our Green Mosaic Cross step by step has an an excellent breakdown of a similar project and the steps you need to follow.

What you need to make a mosaic cross:
Purchase as a craft kit at R115- Masonite cross, mosaic blank
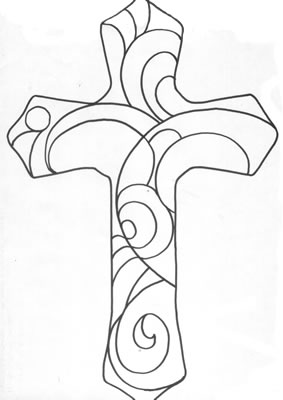
- Mosaic designs, make up your own or print ours
- Carbon paper
- Pencil
- Coloured pencils
- Masking tape
- Various shades of blue & green mosaic tiles
- Mirror bits
- Tile glue
- Mosaic tile grout, white
- Two-wheel tile cutter / nipper
- Water
- Mixing bowl
- Ice cream stick
- Sponge
- Old dry towel
- Plastic or latex gloves
Read through all the instructions first before starting this mosaic cross project, and make sure that you have all the required materials at hand. You can also spend some time looking at patterns to find the mosaic designs you like most.
Step 1
Start by printing the mosaic designs for the mosaic cross.
Step 2
Next we need to trace the mosaic designs onto our masonite mosaic cross blank. If you don't have a sheet of carbon paper big enough, use masking tape to stick a few carbon paper sheets together to cover your mosaic cross blank. Place the carbon paper, carbon side down, onto the cross and then lay your mosaic designs on top of this, ensuring the pattern is centred on the cross. Use a few strips of masking tape to hold the mosaic designs and carbon paper in place to prevent it from slipping.
Step 3
With the carbon paper and mosaic designs held in place by the masking tape, use a pencil or crochet needle and trace over the design, pressing firmly to transfer the mosaic designs onto the masonite mosaic cross blank.
Step 4
Once you have traced over the entire mosaic design, remove the masking tape and carbon paper. Now use your coloured colouring-in pencils and colour the various sections of the mosaic design. This will make it much easier for you to follow the pattern and design when mosaicking your cross.
Step 5
Place a small amount of glue onto a small section of the cross, and start by sticking your mosaic tile pieces and mirror down, following your coloured-in mosaic designs.

Step 6
Keep filling up your mosaic cross, little by little, section by section, using your mosaic tile cutters or nippers to trim or cut any mosaic tiles if you need to. Once your mosaic cross is filled with mosaic tiles and mirror bits, leave it for a few hours to allow the glue to fully dry.

Step 7
Once the glue is dry, it is time to mix the grout. Grout goes from being too thick to being too runny very quickly, so rather work with a little extra care and add a little water to the grout bit by bit, mixing each time to see if you have reached the right consistency.
The right consistency for mosaic tile grout is that of a very thin toothpaste, or mayonnaise. Make sure you have crushed any lumps and scraped the sides of the container.
Step 8
Apply the grout using your ice cream stick, to your mosaic cross. With a firm sponge, spread the grout ensuring that you force the grout into all crevices and cover the edges of the masonite board. Lightly wipe away excess grout with your sponge and leave the mosaic to dry.

Step 9
Once the grout is thoroughly dry, you will be able to wipe away the remaining excess grout with a wet cloth and polish the tiles up with a dry cloth to add a beautiful, shiny finish to your mosaic cross.


Step 10
Your cross is done, enjoy!
A beautiful gift for someone or a lovely decoration in your home!